New to 40K papercraft?
We all had to begin somewhere!
If you're here, you've probably already decided to give papercraft a shot. As such, you'll be needing to know the tools required before you begin printing out some of the occasionally confusing models. If your aspirations are to build a massive 40K titan, I suggest that you start with a smaller project first, although there is nothing wrong with jumping into the big daddy stuff right away. I do find however, that many people have short attention spans and generally get frustrated when they begin a large complicated 50+ page model without having some of the basics down first. That being said, lets begin with the tools you need!
If you're here, you've probably already decided to give papercraft a shot. As such, you'll be needing to know the tools required before you begin printing out some of the occasionally confusing models. If your aspirations are to build a massive 40K titan, I suggest that you start with a smaller project first, although there is nothing wrong with jumping into the big daddy stuff right away. I do find however, that many people have short attention spans and generally get frustrated when they begin a large complicated 50+ page model without having some of the basics down first. That being said, lets begin with the tools you need!
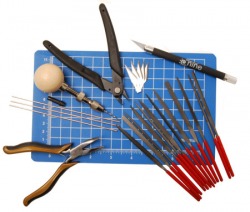
Before we reall get into the weeds here, I want to say that I highly suggest purchasing the Gale Force Nine hobby kit for around 50$. The kit includes the knife obviously, as well as a great pair of side cutters, a full file set, appropriately sized needle nose pliers, cutting mat, extra blades and a hand drill. It may seem like a substantial investment, but if you've got no tools, this is definitely the way to go. You will find however, that for many larger projects, the cutting mat is insufficient in size, but is super handy for small, detailed bits, in addition to being very portable as a kit. Games workshop sells comperable products, but normally at double the cost individually. Off the top of my head, it looks like a comperable kit from GW (they don't even sell cutting mats as far as I know) would run around 100$, so this is really a decent deal that extends beyond papercraft; most of these tools are essential for converting and properly assembling most models, and it's likely many of you already have the components handy. You can buy the kit at your local FLGS (Friendly Local Gaming Store or directly from GF9 HERE.
Cutting Mat
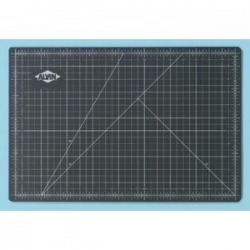
A self healing cutting mat is an excellent and almost essential tool, although it may not seem like it initially. Many people begin by using plastic or wooden cutting boards that were designed for kitchen use, but quickly discover that a self healing cutting mat is practically required for substantial papercraft work. For one thing, a wooden or plastic cutting board just chews through cutting blades. I recall when I first starting out using plastic cutting boards, thinking myself wise for saving money. After going through an entire set of 5$ x-acto blades to finish one Space Marine Rhino, I gave a cutting mat a shot. Generally now, I change blades maybe once a month, vice once a day, as before. Trust me on this one guys; invest in one of these as it will pay for itself in the first week. The best deal I'm aware of on the net for one is for only 10$ and can be found HERE.
Hobby Knife
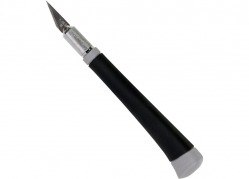
Here, I'm going to deviate from my anti-GW rhetoric for a moment and say that their hobby knife is frankly, the best I've encountered. Granted, almost ANY hobby knife will get the job done, from the very basic metal cylinder of the x-acto brand knife, to this gorgeous offering from GW posted above. But trust me, after hours of cutting and scoring, your hand will thank you for spending the extra money on the GW handled hobby knife. It's almost perfectly balanced, and coated in an easy to grip rubber; it just "feels" right. Give it a shot, and I promise you won't be dissapointed. You can order one HERE.
Steel Ruler
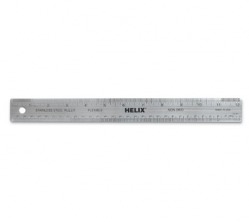
You're also going to need a good steel ruler, with a nice cork or rubber backing. The ruler is used for getting accurate cut and score lines. Many people have attempted to use wooden or plastic rulers and have quickly wound up back at the store for a steel version after shaving off peices of the other kind with the hobby knife. Don't waste your time, and just get one before you begin. These can be had for around 3 dollars, give or take from any office supply store, or you can order one HERE.
Cardstock
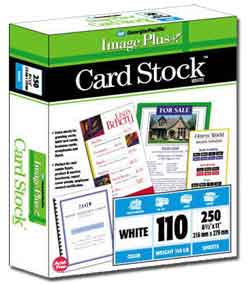
This is actually one of the most prevelant questions out there for beginners. "What material can I use to make the models?" While plasticard is most certainly a viable option, it is generally cost prohibitive, as well as being much more difficult to work with. I use plasticard to a certain extent, but the pure paper enthusiast in me has generally won out, and I've built some fairly massive constructs using nothing but cardstock. When it comes to the proper thickness, referred to as "weight" of a paper, I usually reccomend as heavy as you can reasonably find. This is normally 90lb to 110lb cardstock that can be picked up at pretty much any big box store such as Walmart, Officemax or any small copyshop. I feel it necessary to say that Cougar Opaque 80lb coverstock (Item number 7703) is the end all be-all of cardstock modeling as far as I'm concerned. It's texture and weight are greater than any 110lb cardstock I've ever used. Unfortunately, it can only be found online, and online retailers change so much that I'll leave it to you to locate this expensive paper if you can find it. It averages out to around 10 cents a sheet, so it's not terribly cost effective in comparison with regular cardstock though. Some people prefer modeling out of photo-paper as it has a nice glossy surface that can have the designs printed right on it, and is of a solid enough weight to be buildable. Generally, I reccomend 110lb Georgia Pacific cardstock from Walmart as it's easy to get, of high quality and is the most cost effective building material out there. You can buy it at any Walmart or HERE; although the price is much higher buying it online.
Plasticard
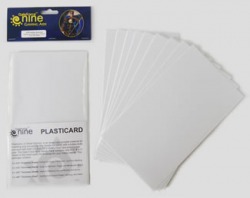
Plasticard is NOT explicitly necessary, despite what many people believe. Models built from plasticard DO tend to have a more solid feel to them when handled, but is actually structurally un-necessary and prohbitively expensive in my opinion. To build one of my Warlord Titans in plasticard would cost somewhere around 200$, as I would need around 50 legal sized sheets just for the basic shape, nevermind decoration. Additionally, cryoacetate glues are a must for assembly, and some form of tacky glue for pre-fitting peices. You'll also need a substantial substructure, which I happen to build into most of my paper models anyway, but with plasticard it's necessary to support it's own weight on larger projects; especially on Titans were the knee joints bear the brunt of the weight. I DO however suggest picking up a variety pack from Gale Force Nine for around 10$, as it comes in handy occasionally for putting plastic "armor plates" on large flat cardstock areas that tend to warp during assembly. To use it for the purpose of paperhammer 40K, you have to print out the plans onto regular paper, then trace the section you want via hobby knife onto the plasticard and then snap it out. You can get a pack HERE.
SuperGlue
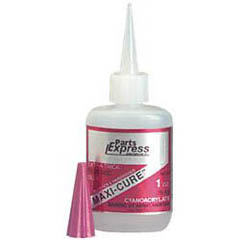
I cannot reccomend this stuff enough. You might be wondering why I suggest superglue to build paper models. The reason is because it has zero water content, which means that there is no chance of warping due to glue drying, and because the bond it makes is immenently superior to any othe glue I have ever utilized in this hobby. This is sort of my trade secret for building such large models. It bonds nearly anything to anything else, and because of the extra thick gel like nature of this particular brand of glue, you can even "slide" corners and tabs around a bit after application. It takes a little longer than regular superglue to setup. People that say no to superglue haven't tried superglue gel. When cardstock modeling sometimes you have to apply the glue, approximately close the tabs, and then slide the peices around a bit for a nice clean fit. Combine with zip-kicker, the next product on the list, and you have an instant permanent bond that will outlive the model itself. You can buy it at almost any FLGS that has a clue, and HERE.
Zip Kicker
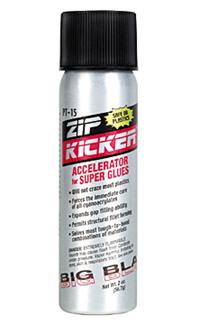
This is my preferred brand of superglue accelerator, and will greatly speed up the rate at which you can assemble. Superglue sets up fast, in comparison to other glue types, but with one spritz of zip kicker, the bond is made literally instantly. Appl the glue to your tab, use both hands to position the sides, then grab the zip kicker and spritz the seam. Now you can move on to the next peice. It saves you tons of time, and is also super handy becuase in conjuction with the super thick superglue mentioned above, superglue can be used as a gap filler, for any tiny openings or seams that may be the result of a less than perfect fit. Fill the seam with the superglue gel, spritz this on, and then file over any rough areas with your hobby file. It's virtually elimated the need for greenstuff for me! You can buy it at most FLGS stores or HERE.
White PVA Glue
There are a wide range of opinions when it comes to PVA or "white" glue, and I believe I have tried nearly everything out there from the highly reccomended Aileen's Tacky Glue to the knock off generic "school" glues. At the end of the day, I have found that, frankly, it doesn't matter. Many people suggest a low water content glue, such as that as used for scrap booking, and it does, in fact work, but not any better. I also hear that people complain about warping due to high water content glues, but I have NEVER seen this happen from generic "white" glues as long as they were used in the appropriate, small amount. My guess is that people have a bad habit of applying too much glue, which may be causing their warping problems. If this is the case for you, and you can't control your impulse to slather glue onto your project, then by all means, go buy the expensive low or no water versions at any craftstore or scrapbooking store. For me though, it's whatever is on sale. If you wait for the "back to school" sales, you can frequently pickup this or other brands for around 25 cents a bottle, or you can order some HERE for around 70 cents.
Skinny Stix
These are just a straight ended and narrower version of popscicle sticks. The reason I suggest these is because of their square ends, it's much easier to build internal frameworks, as well as external decorative elements. They are about the right scale to represent floor boards, or large fence sections for terrain projects too! Inside nearly all of my larger models, I reinforce not with plasticard or extra paper, but these super cheap, and super strong wood slats. These, in my opinion are another must have. And at 3$ for a package of 75, you can't complain about the price! You can get them literally, almost anywhere; from Warlmart, to Michaels to AC Moore, or HERE.
