Silhouette SD
This machine made out with your mom. Twice.
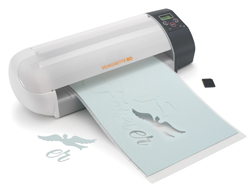
Simply put, the Silhouette SD (also called the Craftrobo depending on where you live) is a paper cutting machine. It was originially designed for scrapbookers, and their website: http://www.silhouettemachine.com/ clearly reflects that target audience. Don't let the clipbook art and Martha Stewart facade fool you though. Under that veil of pastel colors and cutesey-wootsey sketches lies a paper cutting beast that's dieing to slip it's knife into some 110lb cardstock and slice it into a myriade of peices for your twisted model building pleasure.
The Silhouette SD is pure sexy in a can. With the software, and a little photoshop or gimp experience, you can be making your own 40K army in no time. Frankly, you'll almost never pick up a hobby knife again, except to pick out the occasional bit that may not have cut through all the way, which can happen in very tight corners. Additionally, some forward thinking paper designers such as One Monk and Mel Ebbles already make their models with the robocutter files included!
As if that wasn't awesome enough, the king-daddy of all papercraft software, Papakura sells a tie in for it's free PDO viewer for 15$ U.S. that allows you to print directly from papakura, so you don't have to do a think to a properly formatted file, other than hit print, and then cut! Many PDO files will need to be reconfigured however, to fit within the software's guidelines. For that, you'll need to download the full version of Papakura Designer. Simply click and drag some files around, save it, and then check in the viewer if everything fits! Then you're off and mass producing paper models. While the machine is cutting one sheet, you're assembling another, and your production time goes from hours to minutes depending on the model!
You can also design your own paper models with free software, such as Sketchup from google. In fact, if you purchase the Papakura Designer, you can take almost any 3d model format from almost any program and convert it into a paper model! Papakura makes it very easy to scale a 3d design up or down to suit your needs! As if that wasn't enough, you can take 3d models from the 40K games, such as Dawn of War or Soulstorm, and import them into Papakura to be turned into 3d paper models, of whatever scale you like!
You can watch a video of the results I made here: http://www.youtube.com/watch?v=dVSNN5_Tawo
Design Process - Using other people's plans to make GSD files

My workflow follows the one that the legendary SquirmyDad setup for us a while ago, except that I don't put registration marks on my PDF's. I make a combined GSD file that you can print and cut from in one go. The filesizes are larger, but the way I see it is that if you have a robo-cutter and need the registration marks, why wouldn't you just download one set of GSD's? The PDF's are un-necessary at that point, unless you happen to be printing from your office or some sort of mobile device which doesn't have the robomaster software. If you happen to absolutely NEED a PDF of the file, you can download Cutepdf for FREE and "print" to the software, to have it generate a PDF of your own.
With that said, here's a brief pictoral of how I do it, using Adobe Photoshop. Firstly, download the template pdf I've attached HERE.
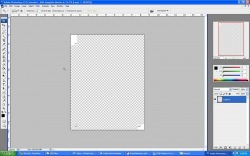
1. Open up the template attached HERE in photoshop.
With that said, here's a brief pictoral of how I do it, using Adobe Photoshop. Firstly, download the template pdf I've attached HERE.
1. Open up the template attached HERE in photoshop.
2. Open up the file you want to work on in photoshop.
3. Draw a select box over the entire viewable file you want to work on, and copy it.
3. Draw a select box over the entire viewable file you want to work on, and copy it.
4. Close out the file you just copied, not saving any changes.
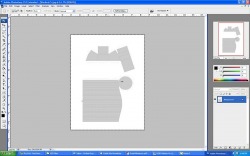
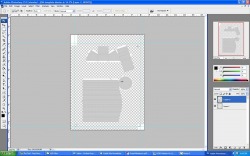
5. Control + V (paste) the copied file on top of the template. (This creates layer 2 as you'll see in the photo; work with this layer until the end, then merge them.)
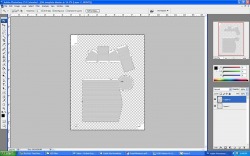
6. Select the magic wand tool.
7. Click any open area to select all the white.
8. Press the delete key.
5. Control + V (paste) the copied file on top of the template. (This creates layer 2 as you'll see in the photo; work with this layer until the end, then merge them.)
6. Select the magic wand tool.
7. Click any open area to select all the white.
8. Press the delete key.
9. Now you can see where to organize your file to fit within the registration marks.
10. You can also draw down lines from the edges of the rulers at the top and to the left 1 inch down from the bottom, 1/2 inch from the top and both 1/2 inch in from both sides.
10. You can also draw down lines from the edges of the rulers at the top and to the left 1 inch down from the bottom, 1/2 inch from the top and both 1/2 inch in from both sides.
11. Merge all layers and save as whateveryoureworkingon.jpg
12. I tend to delete the layer with the registration marks, but this is not explicitly necessary.
13. Next, use the magic wand tool again to select all the white space that you want "cut out" by the robocutter software.
14. Click Select (up top in the bar) then "Inverse".
15. Click Edit then "Fill" and fill with a solic black color. This should leave you with a solid black image of the parts you are working on, and the parts that will be cut out, that is, left behind on the sheet of paper will be white or translucent.
16. Save this file as whateveryouareworkingon-OUTLINE.jpg.
17. Open up your robomaster software and create a new document.
18.
